Introduction
With this release, we update minor tweaks in the system to enhance the system performance and ease of navigation for the users.
Please review the updates below.
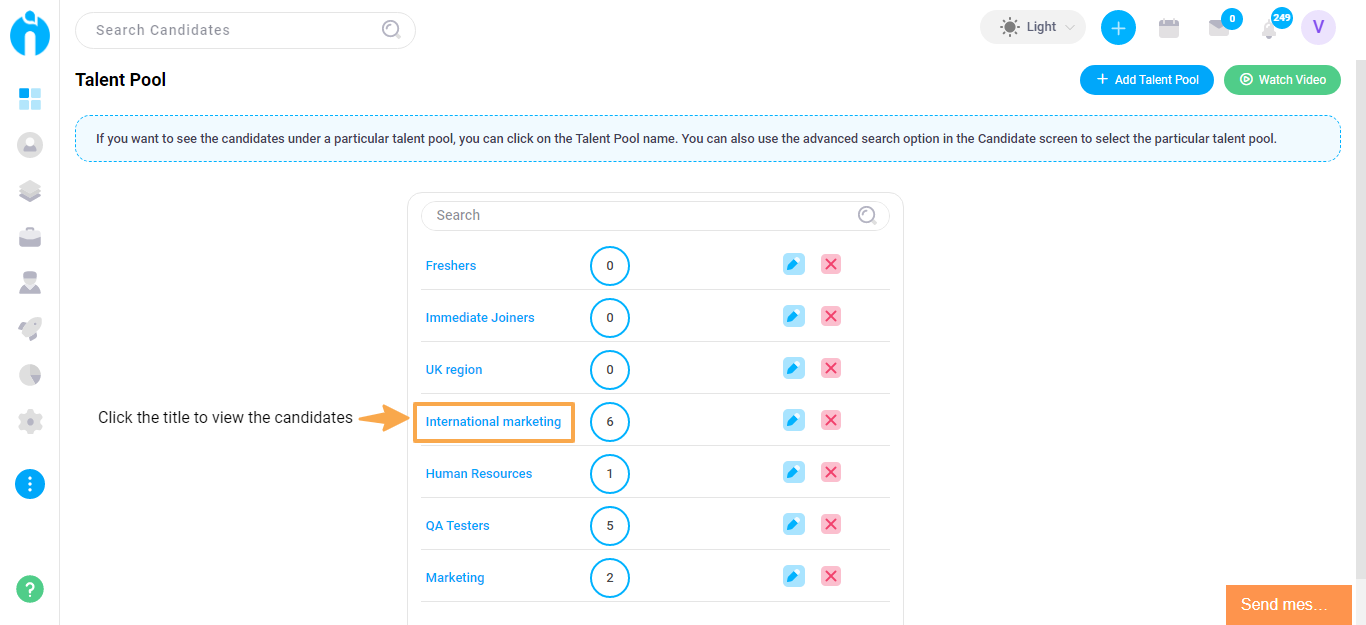
View candidates of a Talent Pool
We introduced a new place for users to view the list of candidates who are a part of a particular talent pool. While managing existing talent pools and while adding a new one, you can view the current list of candidates added to a particular talent pool within the same module.
Page link: https://app.ismartrecruit.com/searchFolder
Navigation Path: Three dots (from the bottom-left corner) >> Talent Pool >> Click on the title of the required talent pool to view the candidates' list
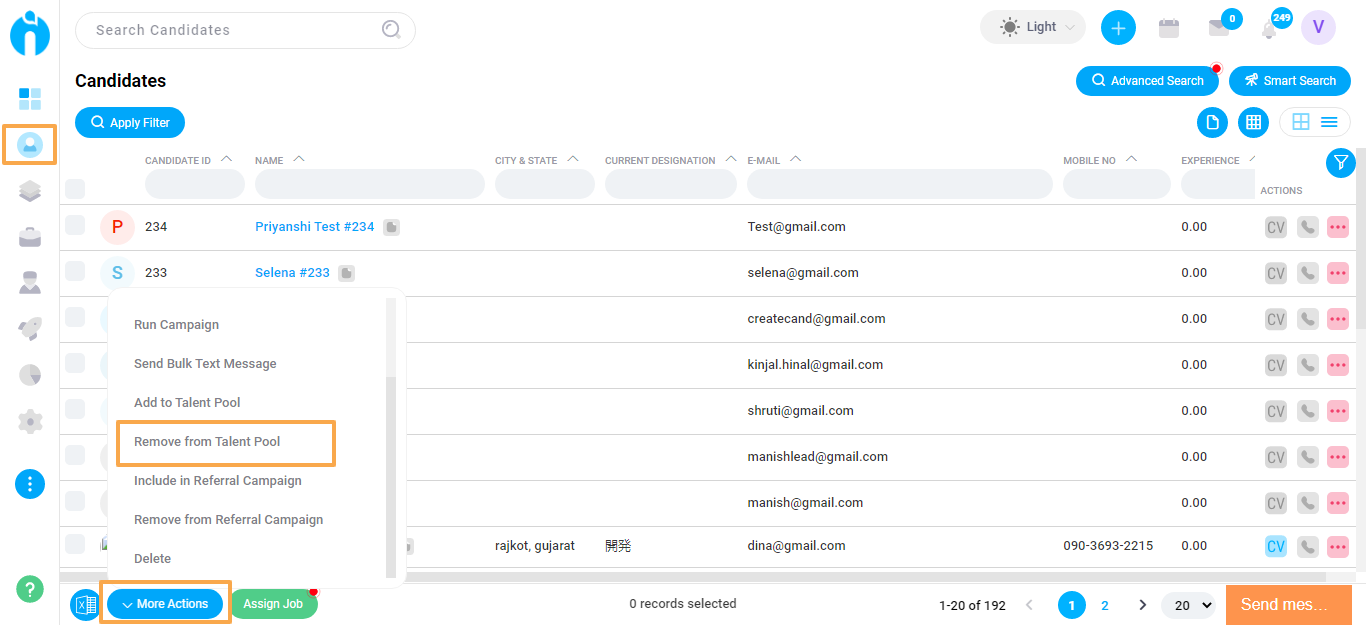
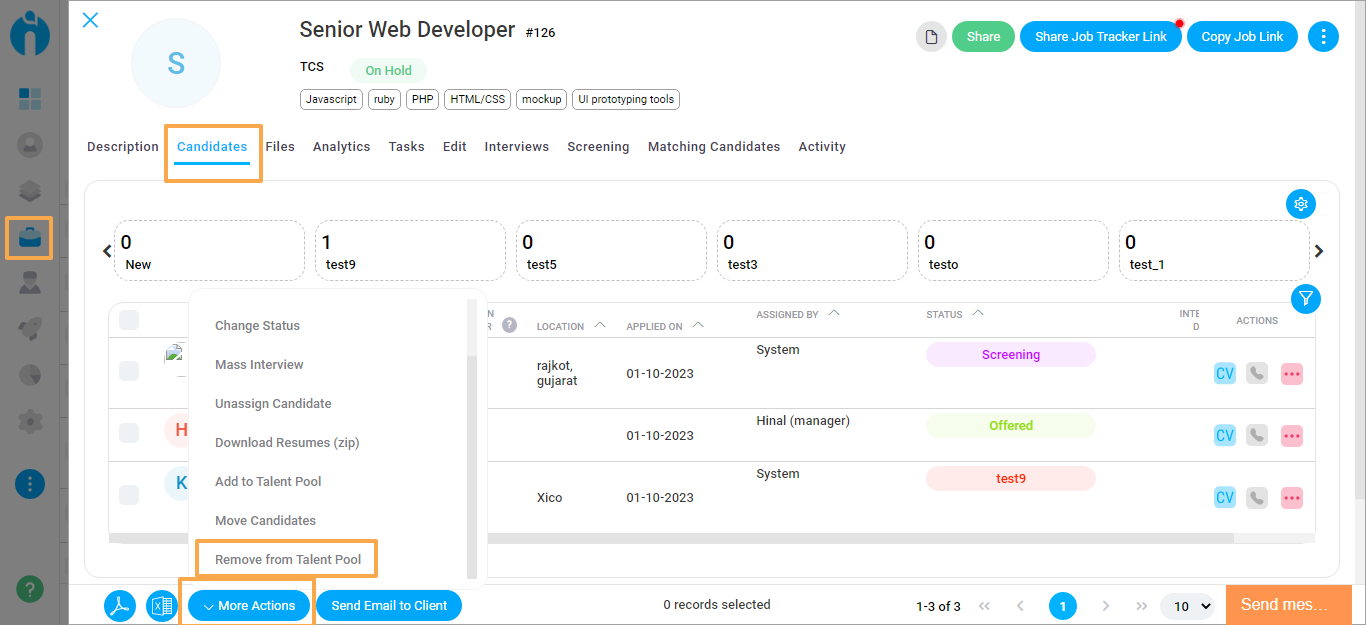
Remove Candidate from the Talent Pool
You can now easily remove candidates for the Talent Pools with a single click. This option is available at multiple places in the system. In case the candidates are added to multiple talent pools, you can choose to remove them from the required talent pool.
Page link: https://app.ismartrecruit.com/quickSearch
Navigation Path: Candidate module >> Select required candidates >> More Actions (button at the bottom) >> Remove from Talent Pool
Page link: https://app.ismartrecruit.com/openJob
Navigation Path: Jobs module >> Open a particular job >> Candidates tab >> Select required candidates >> More Actions (button at the bottom) >> Remove from Talent Pool
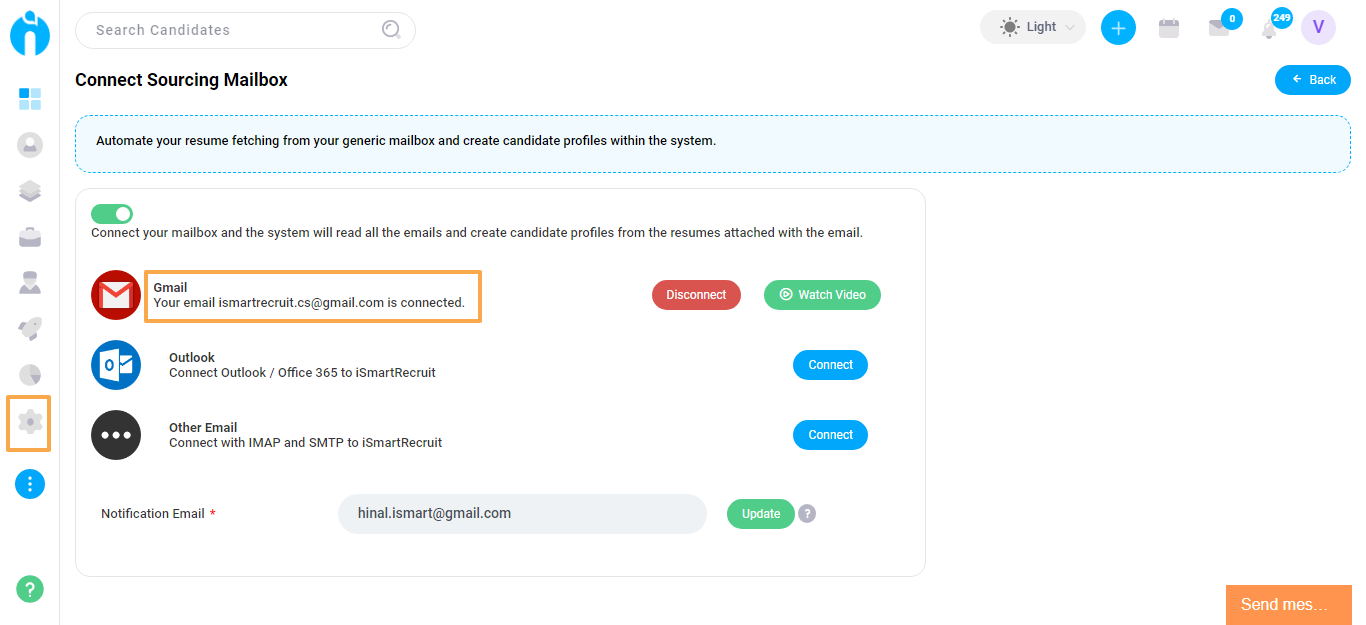
Connect Sourcing Mailbox - View connected email account
The email account that you connect under the Sourcing Mailbox feature, will now be visible. This will assist in avoiding confusion and differentiate between personal email accounts connected with the system for communications and the company email account connected to automatically import candidate resumes to the system.
Page link: https://app.ismartrecruit.com/connectSourcingMailbox
Navigation Path: Admin >> Integration >> Connect Sourcing Mailbox
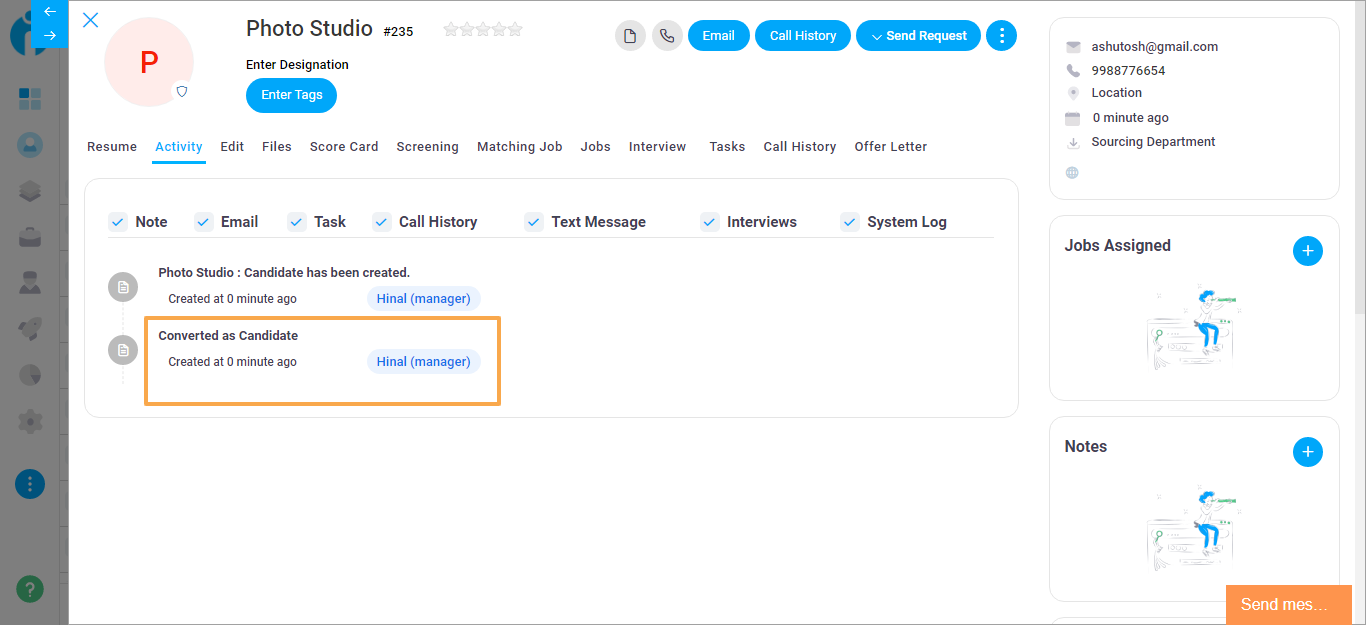
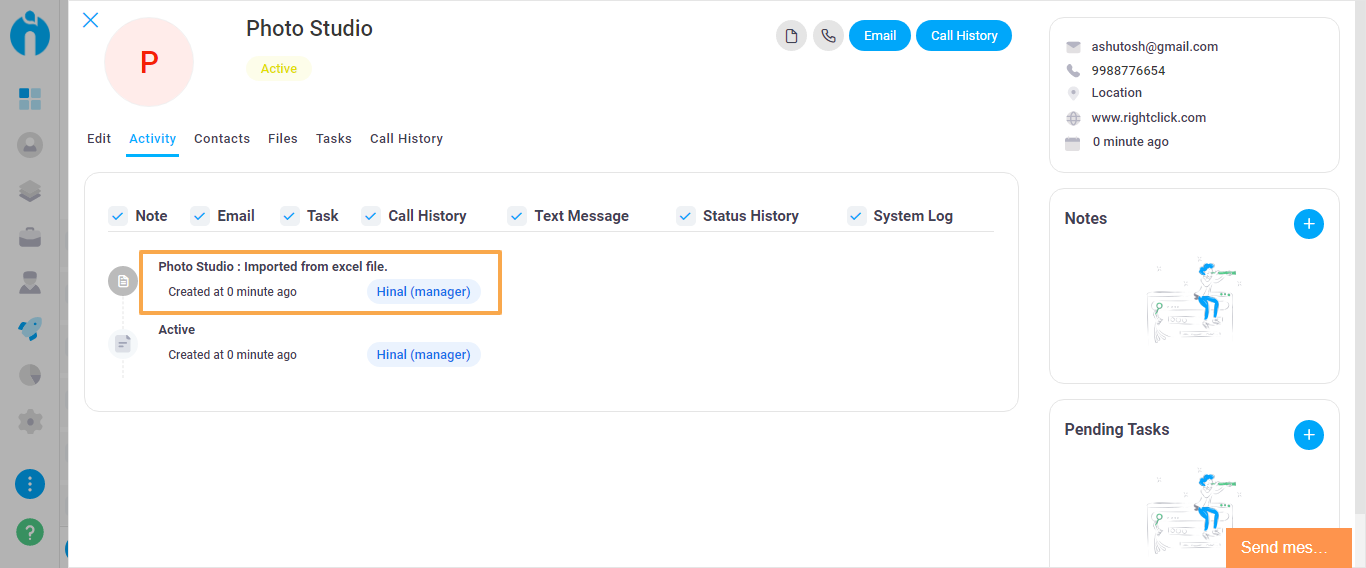
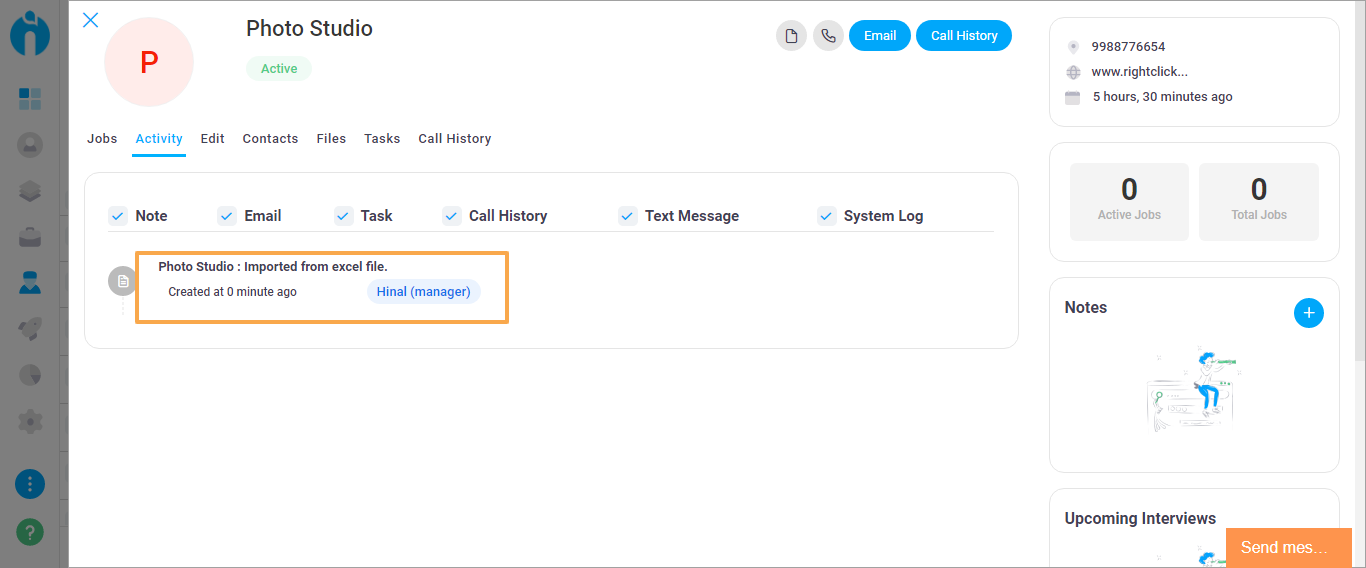
System Log entries for all data creation
While creating a Lead or Client through Excel import, and while converting a lead to a candidate or a client form within the system, the system will capture an entry log. This is to record the creation method used while adding the data. This way, the source of the data gets recorded for future reference. These entries will get recorded in the Activity tab for each module.
Convert Lead to Client
Page link: https://app.ismartrecruit.com/searchClient
Navigation Path: Client module >> Open a particular client >> Activity tab >> Select System Log

Convert Lead to Candidate
Page link: https://app.ismartrecruit.com/quickSearch
Navigation Path: Candidate module >> Open a particular candidate >> Activity tab >> Select System Log
Import Lead from Excel
Page link: https://app.ismartrecruit.com/searchProspect
Navigation Path: Lead module >> Open a particular lead >> Activity tab >> Select System Log
Import Client from Excel
Page link: https://app.ismartrecruit.com/searchClient
Navigation Path: Client module >> Open a particular client >> Activity tab >> Select System Log
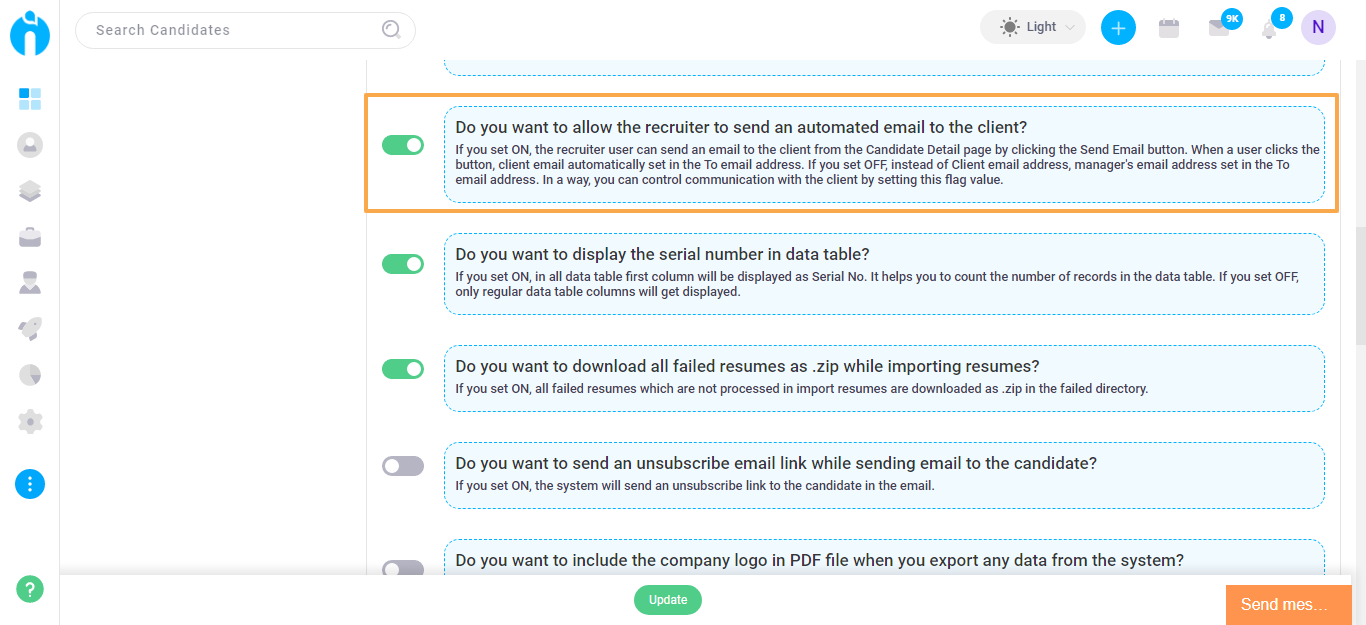
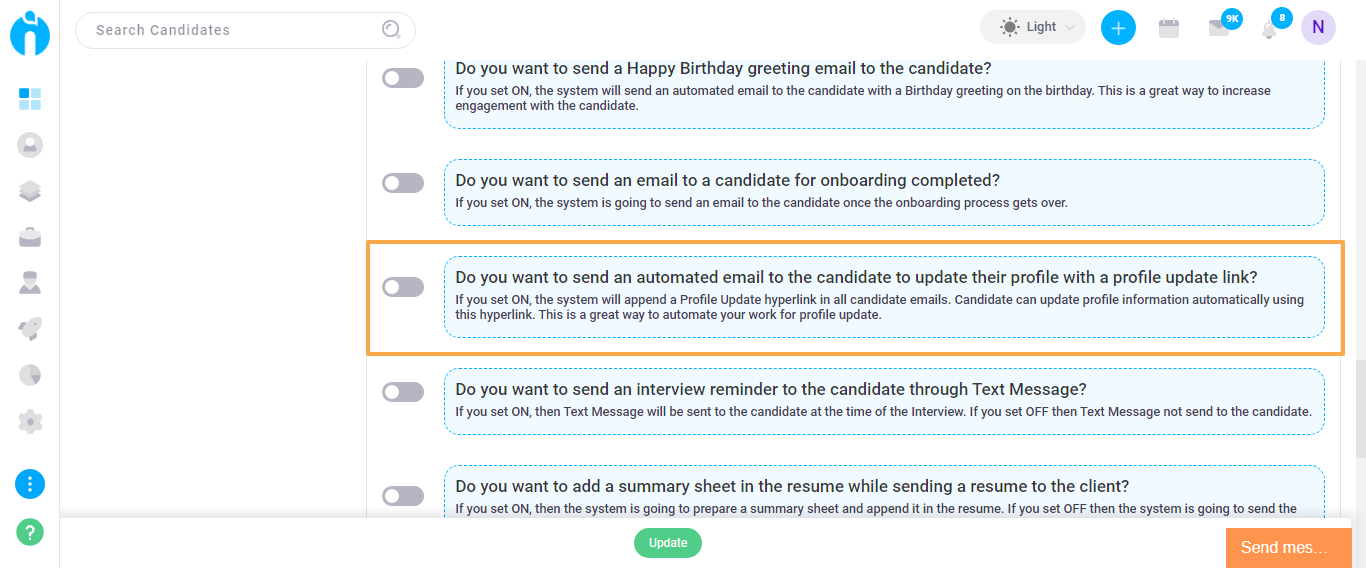
Tweak setting options - Removed
The Tweak settings where you could manage permission for Recruiters to send emails to clients, and to send an automated email to candidates to update their profile, are removed.
Page link: https://app.ismartrecruit.com/systemConfig
Navigation Path: Admin module >> Global Settings >> System Configuration >> Tweak Setting
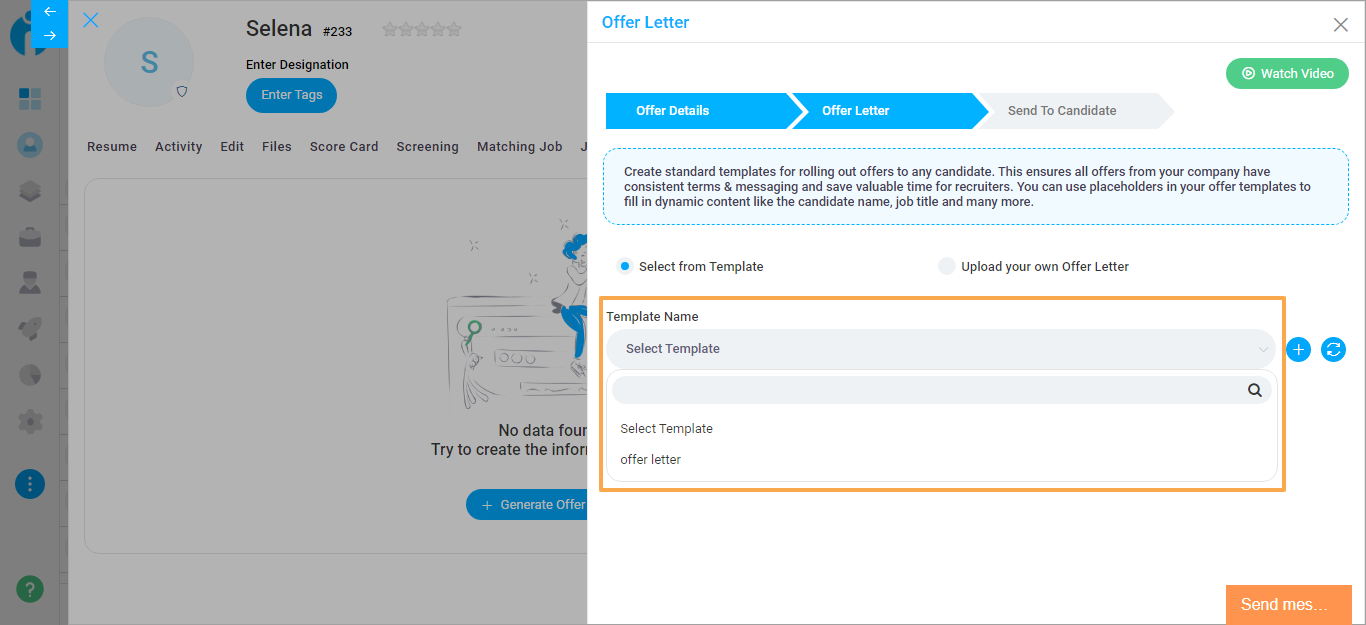
Offer Letter documents
While generating an offer letter for a candidate, you will now only see templates of documents which are Active in the Doc Templates section. You will not see Inactive documents as an option to choose from while generating the Offer Letter.
Page link: https://app.ismartrecruit.com/quickSearch
Navigation Path: Candidate module >> Open a particular profile up >> Offer Letter tab >> Generate Offer letter >> Second step of generating the Offer Letter >> Select Template
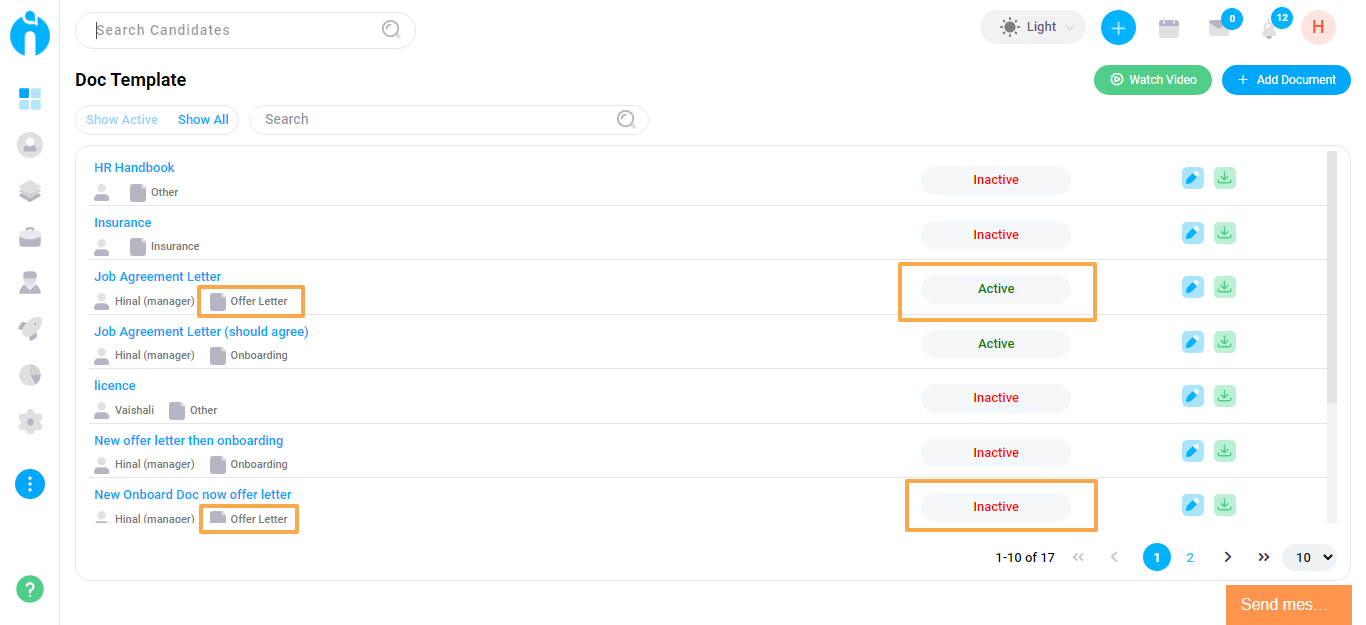
Offer Letter documents in Doc Templates
Page link: https://app.ismartrecruit.com/manageDocuments
Navigation Path: Three dots from the bottom-left menu >> Doc Templates
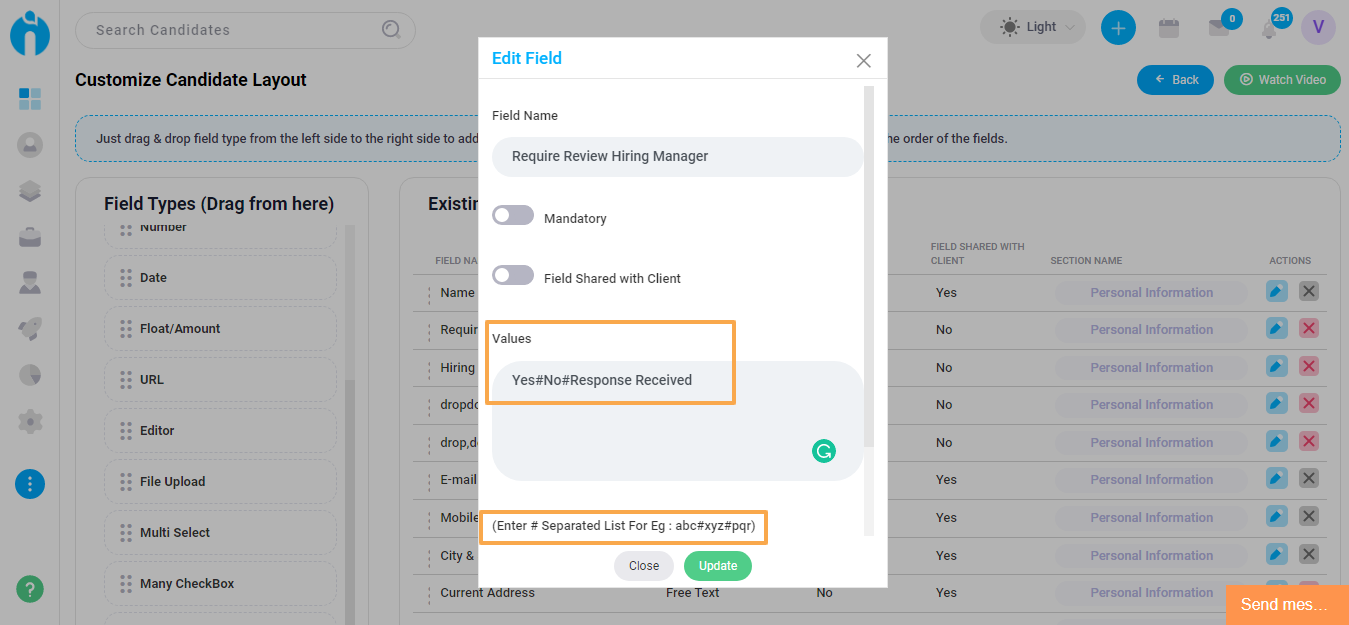
Dropdown options separated by #
While adding any custom fields in the Candidate, Job, Client, Department or Lead layout, all the below-mentioned fields will require you to add selection values separated by # (hash) instead of a , (comma).
- Dropdown select
- Multi Select
- Many CheckBox
Page link: https://app.ismartrecruit.com/admin
Navigation Path: Admin module >> Customization >> Customize Candidate layout / Customize Job Layout / Customize Client Layout / Customize Department Layout / Customize Lead layout
Candidate confirmation for an Interview
While scheduling an interview for a candidate, they receive the interview details in their email along with links where they can either confirm or reject the interview. Recruiters can view their confirmation status within the system easily under the scheduled interviews list.
Page link: https://app.ismartrecruit.com/openJob
Navigation Path: Jobs module >> Open a particular job >> Candidates tab >> Three dots icon for the required candidate >> Interviews >> Tick mark icon for the interview
.png)